


The Kirtchner Stitch - A tutorial
Yes, I know, there are MANY places on the internet that describe how to do the kirtchner stitch. I have found, though, that many many people still give up and think that they can't do it even after reading these tutorials. I think it might help to explain the theory, and maybe my description will be just enough different that it will finally "click" in your head and you go "AHAA!!" We all learn and understand things differently, and just because you never got it with a previous explanation, doesn't mean that you can't do it. You just haven't found the one explanation that really makes sense to you yet.
The Kirtchner Stitch:
This is a way of "grafting" or literally fusing 2 pieces of knitted fabric together. There is no seam. Your sewing literally makes a new line of knitting to join the 2 pieces and it is now 1 solid piece of fabric. It is most often used in socks and shoulder seams. There are a few rules of when you can do this though:
As if to pearl-
This means that you insert your needle through the front leg of the loop from right to left just like you would with your knitting needle if you were pearling.
As if to Knit-
This means that you insert your needle through the front leg of the loop from left to right just like you would with your knitting needle if you were knitting. I am a combined knitter, which means I usually knit through the back loop of the stitch rather than the front. This term confused me for a long time. All stitches made using the kirtchner method are though the front loop of the stitch.
Drop off-
Once you have passed your needle through the stitch allow it to drop off of the kniting needle. This signifies that you have completed that stitch just like you drop the stitch off the needle each time you complete a knit or pearl stitch while knitting the fabric.
Leave on-
Do not drop the stitch off of your knitting needle once you have passed your needle through. Each stitch needs the needle to pass through twice. On the first pass we leave it on, on the second we allow it to drop off.
Things to remember:
 We will start out simple and look at grafting 2 pieces of plain stockingette fabric together. Grab yourself a pair of size 8 needles, and some worsted weight yarn to practice. It is much easier to see the stitches with this weight of yarn than to try for the first time on your tiny little sock needles.
My sample has some k2p2 ribbing half way across. Ignore that. We'll be using that for the more advanced kirtchner class later on.
Thread a yarn needle with a contrasting color of yarn. This yarn should be about 4 times the length of the fabric you are grafting.
 Place your 2 pieces like so, with the right side of the front needle facing you, and the wrong side of the back needle. Notice that since we are looking at the wrong side of the back needle, all of those stitches are pearl stitches. We will treat them from now on as pearl stitches, even though we know they are knit on the right side.
 Step 1:
Insert your needle through the first loop on the front needle as if to pearl (This is from right to left, and in the opposite direction of the knit stitch). Leave the stitch ON the knitting needle.
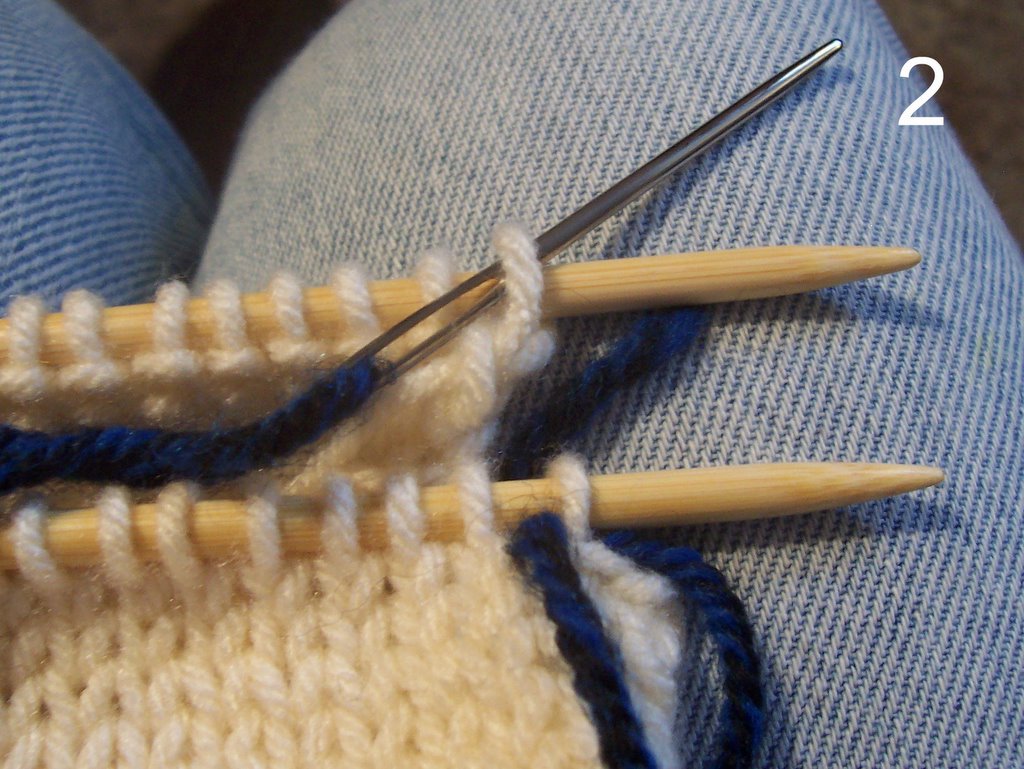
Step 2:
Now insert your needle through the first stitch on the back needle as if to knit (This is from left to right, and in the opposite direction of the pearl stitch). Leave the stitch ON the knitting needle.
You have now made 1 pass through the first loops on both the front and back needles.
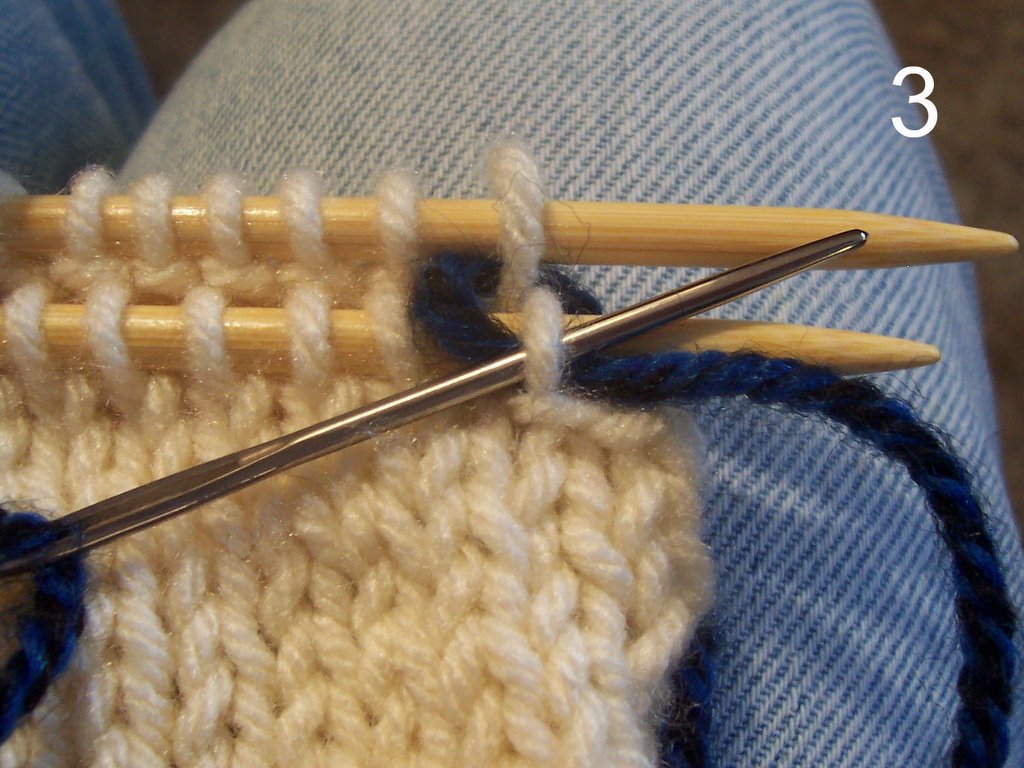
Step 3:
Pass the needle through the first loop on the front needle as if to knit. You have now passed your needle through this stitch twice, allow it to drop off the knitting needle.
Step 4:
Now, let's make our first pass through the next loop on the front needle. Pass the needle as if to pearl through this stitch. Leave it on the needle.
Step 5: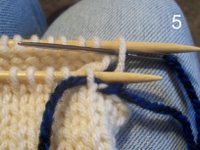
Pass the needle through the first stitch on the back needle as if to pearl. This is your second pass through this loop. Allow it to drop off your needle.
Step 6:
Now let's make our first pass through the next stitch on the back needle. Pass the needle through this loop as if to knit. Leave it on the needle.
Continue repeating steps 3 through 6 until you have dropped all your stitches off the knitting needles.
If it helps, chant to yourself as you do this:
"Knit off, pearl on, Pearl off, knit on" This is the pattern that you are following.
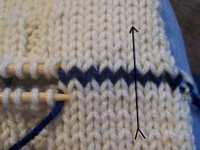 When your graft is completed it should look like this:
Notice how the line of "V" knit stitches continues uninterrupted right past my new blue graft line? It takes practice getting your stiches to be the same gauge as your knitted fabric. After all, you don't have the benefit of a knitting needle to keep them even. If they are too tight, take your darning needle and loosen them up one at a time, if they are too loose, tighten them up a bit. Like all finishing, this takes time and practice. Don't worry if you mess up a bit. Pull it out and try again. This is why we're using large easy to see knitting.
The Kirtchner Stitch:
This is a way of "grafting" or literally fusing 2 pieces of knitted fabric together. There is no seam. Your sewing literally makes a new line of knitting to join the 2 pieces and it is now 1 solid piece of fabric. It is most often used in socks and shoulder seams. There are a few rules of when you can do this though:
- The stitches on the needles must be live. You can not graft a bound off edge. You can, however bind it off temporarily then unbind it and put it back on a needle for grafting.
- There must be the same number of stitches on both needles. IE: both pieces of fabric must have the same number of live stitches left on the needle in order to graft them together.
- Grafting is usually with the tops of 2 pieces of fabric, but can also be done with a top and a bottom IF the bottom was created using a provisional cast on. Remove the provisional cast on, pick up the live stitches and you are ready to graft.
As if to pearl-
This means that you insert your needle through the front leg of the loop from right to left just like you would with your knitting needle if you were pearling.
As if to Knit-
This means that you insert your needle through the front leg of the loop from left to right just like you would with your knitting needle if you were knitting. I am a combined knitter, which means I usually knit through the back loop of the stitch rather than the front. This term confused me for a long time. All stitches made using the kirtchner method are though the front loop of the stitch.
Drop off-
Once you have passed your needle through the stitch allow it to drop off of the kniting needle. This signifies that you have completed that stitch just like you drop the stitch off the needle each time you complete a knit or pearl stitch while knitting the fabric.
Leave on-
Do not drop the stitch off of your knitting needle once you have passed your needle through. Each stitch needs the needle to pass through twice. On the first pass we leave it on, on the second we allow it to drop off.
Things to remember:
- The needle must pass through each loop twice in order to mimic the path that the yarn would take if you were actually knitting this line.
- The first pass is done in the oposite direction as the type of stitch you are grafting. (IE: as if to pearl on a knit stitch, or as if to knit on a pearl stitch) This stitch is left ON the needle.
- The second pass through the loop is done in the same direction as the type of stitch you are grafting. (IE: as if to knit on a knit stitch, or as if to pearl on a pearl stitch). This stitch is DROPPED OFF the needle.
- Chant "Same on, Opposite off"
- When reading your stitches always look at the side of the fabric facing you. For the back needle this will mean that you are looking at the wrong side of the fabric!
 We will start out simple and look at grafting 2 pieces of plain stockingette fabric together. Grab yourself a pair of size 8 needles, and some worsted weight yarn to practice. It is much easier to see the stitches with this weight of yarn than to try for the first time on your tiny little sock needles.
My sample has some k2p2 ribbing half way across. Ignore that. We'll be using that for the more advanced kirtchner class later on.
Thread a yarn needle with a contrasting color of yarn. This yarn should be about 4 times the length of the fabric you are grafting.
 Place your 2 pieces like so, with the right side of the front needle facing you, and the wrong side of the back needle. Notice that since we are looking at the wrong side of the back needle, all of those stitches are pearl stitches. We will treat them from now on as pearl stitches, even though we know they are knit on the right side.
 Step 1:
Insert your needle through the first loop on the front needle as if to pearl (This is from right to left, and in the opposite direction of the knit stitch). Leave the stitch ON the knitting needle.
Step 2:
Now insert your needle through the first stitch on the back needle as if to knit (This is from left to right, and in the opposite direction of the pearl stitch). Leave the stitch ON the knitting needle.
You have now made 1 pass through the first loops on both the front and back needles.
Step 3:
Pass the needle through the first loop on the front needle as if to knit. You have now passed your needle through this stitch twice, allow it to drop off the knitting needle.
Step 4:

Now, let's make our first pass through the next loop on the front needle. Pass the needle as if to pearl through this stitch. Leave it on the needle.
Step 5:

Pass the needle through the first stitch on the back needle as if to pearl. This is your second pass through this loop. Allow it to drop off your needle.
Step 6:
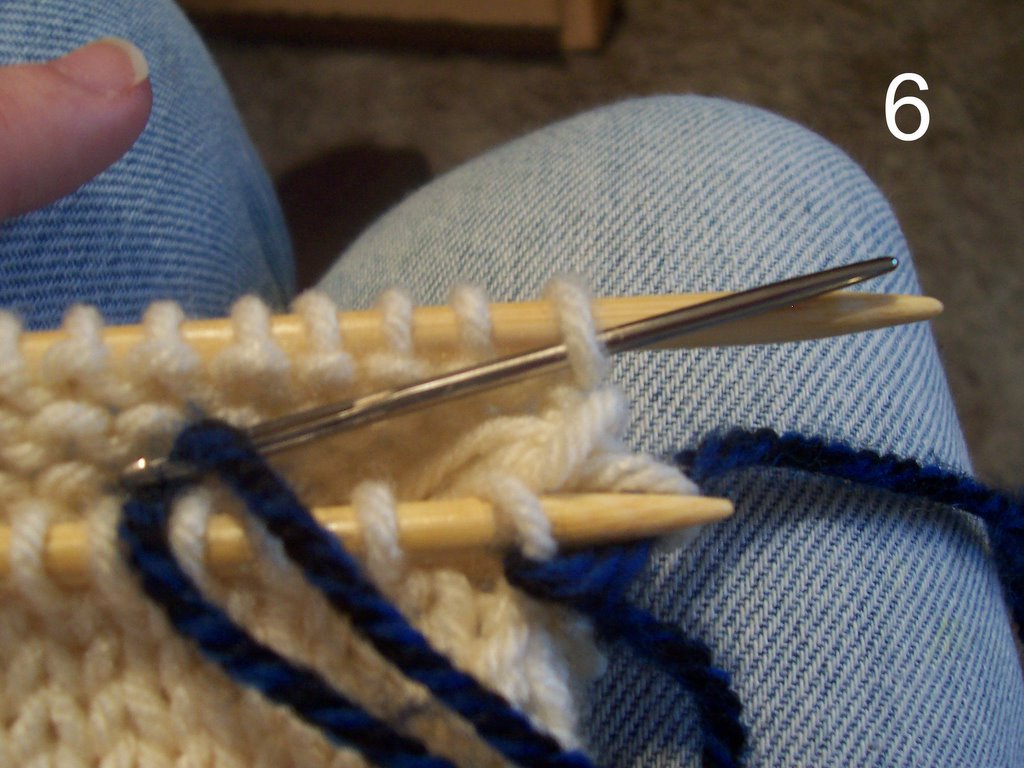
Now let's make our first pass through the next stitch on the back needle. Pass the needle through this loop as if to knit. Leave it on the needle.
Continue repeating steps 3 through 6 until you have dropped all your stitches off the knitting needles.
If it helps, chant to yourself as you do this:
"Knit off, pearl on, Pearl off, knit on" This is the pattern that you are following.
 When your graft is completed it should look like this:
Notice how the line of "V" knit stitches continues uninterrupted right past my new blue graft line? It takes practice getting your stiches to be the same gauge as your knitted fabric. After all, you don't have the benefit of a knitting needle to keep them even. If they are too tight, take your darning needle and loosen them up one at a time, if they are too loose, tighten them up a bit. Like all finishing, this takes time and practice. Don't worry if you mess up a bit. Pull it out and try again. This is why we're using large easy to see knitting.
posted by Dawn | 7:47 AM
![]()
![]()
4 Comments:
This is actually called a KITCHENER STITCH no "R"
thank you thank you thank you soooo very much, this tutorial is excactly what I was looking for, very helpfull! I found it through Ravelry!
Thanx!!
Thank you for the tutorial! AND Donna, shame on you for not accepting this for what it is...a help and not a spelling lesson!!!
Helpful to have spelling when trying to google it!
Post a Comment
<< Home